4.29.2008

What did we NOT plant today?

It was a full day at the farm today. Lots of sunscreen, lots of water and lots of planting. We were grateful for the near-constant breeze that wafted up from the river but, needless to say, that breeze will be gone (and sorely missed) come the summer months.

Alright, down to business.


Here is a list of what we planted today:


sweet corn


pole beans


sunflowers


peppers (bell, jalapeno, chili and banana)


tomatoes (cherry, Roma, beefsteak, heirloom
brandywine)

wildflowers


zinnias


cucumbers


zucchini


okra


carrots


radishes


red onions


Sadly, I don't have enough pictures to correspond to all of this activity. Once I remembered my photography duties, the sun had already begun to set and the light was no good. But I did manage to get a few off before the sun fully set.

But, as you can see, our shadows were l-o-n-g when we finally started packing up.


Here is one of our corn/bean rows. The corn seeds are in back and were placed every 6 inches or so. The beans are in the front part of the row and placed in-between the corn seeds. Also, the sunflowers were planted in the row directly behind the corn/bean row.

Next up is one of our beautiful little bell peppers. We probably have more bell peppers than any other plant in the garden. Which is good since we eat them ALL THE TIME. We eat them more often than we eat tomatoes.

Most of our pepper and tomato plants are ones we grew from seeds. However, some of our seedlings just didn't look hearty enough for the great outdoors so we hedged our bets and bought some plants at a local nursery.


And here is one of our lovely tomato plants all warm and snug in its cage. The cages, lest you accuse us of tomato cruelty, are strictly for the tomatoes' benefit. They send their little stems out the openings and, as they grow, the cage provides support for those (hopefully) tomato-laden stems.


We prepared all of the beds today in the same manner as before. Hoe and rake the bed to break up clumps. Scatter peat/compost mixture. Water afterwards with the liquid fertilizer/water mixture.

You may have noticed that many of our plants have depressions around them. We made those in hopes that during the next rain, which is sure to come any moment now, some rain will gather in these little "volcanoes" instead of running off the side.
We'll see how that goes.

Oh the way home, I quizzed Adam about what plant he is most excited to be growing/harvesting/eating and he, of course, said the chili peppers. He wants to make hot sauce.

My "top plant" is definitely my lovely okra! I l-o-v-e okra and simply can't wait until they are ready to harvest.

We have plans for most of the vegetables. But some of them (ahem, radishes) I'm at a loss of what to do with. Especially in such large numbers. I am excited about learning to can and sharing that (possibly harrowing) process with you. Any tips, pass them along. Please.

Naturally, we are pretty tuckered out after such a day. Off to bed we go....with visions of homemade tomato sauce in our heads.

4.27.2008

Lettuce, Herbs, Successes and Failures

Today's List:
rosemary

thyme

basil

oregano

chives

cilantro

red leaf lettuce

mint


Stevia is a natural sweetener that we plan to use
this summer when we make sun tea.

All of these plants received the same treatment as the zucchini, potatoes and onions: compost/peat mixture in the soil and then a quick watering with the liquid fertilizer/water mixture.

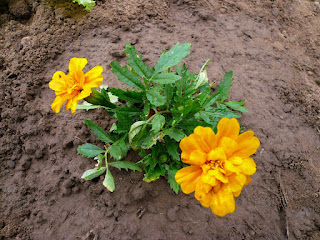
We also planted marigolds at the ends of most of our rows because they are pretty and they serve as a natural pest deterrent.


Our garden design has a seating area in the center with two circular beds surrounding it. We planted the herbs here so that it would be nice and aromatic in the summer when we are relaxing in our chairs. Flowers will be planted later in the back portions of these beds.

We also did an inventory of our garden since Little Rock had experienced another major storm after our last planting.

Some of our zucchinis did not fare too well. Many of them were pretty beaten down after the storm, especially since they were weak to begin with. But, we re-watered them and put them in homemade plastic bottle cloches to protect them from yet another impending storm. Cross your fingers that it works!

In happier news, our onions are starting to sprout.

And our potatoes? Well...just see for yourself:


4.21.2008

Product Placement


I've been talking a lot about the organic liquid fertilizer we use whenever we plant so I thought I'd give it some props here.

It is called John's Recipe and is distributed by The Lady Bug Brand, a division of The Natural Gardener. It contains a blend of seaweed, humic acid, molasses and fish emulsion. So far it's been working pretty well. We dilute 1 Tbs in 1 gallon of water whenever we plant so it goes a long way.

There is a drawback, however. It is our intention to farm organically and, many organic farmers, use animal manure as fertilizer. However, since at least one of us is vegetarian, we shy away from animal manure-intensive farming.

Taking a cue from the Indians, who put a whole fish in the ground with their corn seeds, we thought we'd try this product to start our plants growing because it gets its nitrogen primarily from fish emulsion. Fish emulsion is made by taking the waste products from the fish industry, grinding them up and mixing them with water. Since it is a by-product of the industry, the industry itself does not profit from its use.

And, unlike cow/horse/pig/chicken manure, it does not contain the many antibiotics, pesticides and other chemicals that course through factory farmed animals every day of their lives.

It does, perhaps, contain mercury. And other heavy metals.

That is a concern for us.

We've been looking into it and, from what we can tell, it contains negligible amounts of mercury, if any at all. The term "negligible" is cold comfort but we take what we can get.

In a previous garden, in a somewhat more progressive city, we used a vegan fertilizer that worked wonders. We are on the lookout for a similar product here in the great city of Little Rock. Living in a small apartment with no backyard, we obviously cannot keep a compost or worm bin. So in the meantime....

We do what we can. And, as I've said before, this farm plot of ours is an experiment. A dry run for the future farm of our dreams.

We will see what works and what doesn't work.

We may change our mind about what we support and what we rebuff.

For those of you who are looking for the "perfect" fertilizer, check out these websites when doing your research:

Washington State Pesticide and Fertilizer Information Page

Extremely Green's Organic Fertilizer Guide
Wikipedia's page on Nitrogen-Fixing Plants

4.20.2008

Potatoes and Onions

Potatoes


I'm not much of a potato person - except for when it's in the french fry or sweet form. However, being married to an Irishman, I guess it was inevitable that potatoes would be a part of our garden.

Turns out, planting potatoes is easy! Here's how we did it:

1. We bought some potatoes with every intention of cooking them. But we forgot about them and, when we next looked in the paper sack, we saw they had many, many eyes. So, we decided to plant them.

2. We cut up the potatoes, ensuring that each section of potato had some eyes on it.


3. We prepared the potato beds with a compost/peat mixture and then dug holes about 4-inches deep.


4. We planted the potatoes (eyes facing up!) in the holes and covered with dirt.


5. We watered around each potato with the organic liquid fertilizer mixture. Then we mulched with leaves and watered some more!


UPDATE: Adam tells me that the potatoes did not have eyes. They had eye-buds. Eyes are normal on a potato but when those eyes start sprouting buds the time to eat the potato has passed. When the eyes start sprouting buds, it is time to plant!


Onions


If planting potatoes was easy, planting onions was practically mindless.

First we prepared the bed by raking over it to break up any clumps. Then Adam made "rows of holes" by sticking his finger into the ground. I went along behind him and dropped an onion into each hole.

We covered the holes with dirt, fertilized with the organic liquid fertilizer mixture, watered the whole bed and called it a day.


4.19.2008

First Planting!

While Adam worked on re-tilling our rows, I set about preparing the "round mounds" that would be the home for our squashes, melons and cucumbers. The soil may look hard and cake-y on the top but it is so soft that working it with a shovel and hoe is no problem.

First of all, I broke up the ground surrounding our previously formed mounds. I took this dirt and added it to the mounds. (We have 4 mounds in each section x 4 sections = 16 mounds.)


After forming the mounds, I then sifted through the dirt by hand and pulled out the grass weeds. This sounds a little crazy, but it was actually a lot of fun! I always loved to play in dirt when I was a kid and not much has changed since those days. Plus, I got a good look at all the little bugs and critters living in our dirt.

At the end of the day, I had a bucket o' weeds.


Before I continue, I should say that I'm not a crazy weeder. It isn't something that I necessarily enjoy and it isn't something I think is always important. Overall, I don't think weeds are "bad" and Adam shares this sentiment so I can't see us spending a lot of time weeding. However, our little zucchini and melon plants were raised from seedlings and weren't doing too well....so I wanted to give them the best chance possible.

All that being said, this garden is, in many ways, an experiment for us. We certainly don't know everything there is to know and we hope to learn a lot along the way. By mid-summer we could be reformed anti-weeders with an arsenal of Round-Up at our disposal.

But I doubt it.

After preparing our "mounds" with a compost/peat mixture, I gingerly put our little plants in the mounds. As I said before, these had been raised from seedlings but had started to get weak and spindly in recent days, despite being put out in the sun for a good part of the day. I planted them pretty deep so that their weak bits were under the dirt. A storm was coming in a day and I didn't want them to be torn to shreds.

We made little zucchini "volcanoes" in the middle of the mounds and watered them with a mixture of liquid fertilizer (organic) and water.

Then we wished them luck and headed home.


Next up: Potatoes and Onions!

4.13.2008

Welcome to our blog!

Lots of things are happening in our garden plot right now so we'll have to fill you in on our background at another time.

The first tilling of our plot occurred a few days ago. One of our community farm-neighbors let us use his tiller and we were so happy for it. Up until then, we had been hoeing and shoveling by hand.

We had a basic design for our plot. We made about 5 rows in front and 8 rows in back. In the middle of the plot we designed a seating area surrounded by circular beds. All of our beds are raised to keep the moisture area high around the plant roots without actually drowning the plants.


After spending a day out at the farm, all of our hard work was washed away by one of several storms that moved through the Little Rock area. That's how it goes, I suppose.

After fixing the beds, our next project was to put up a fence. We didn't have a lot of money to put towards a fence but I wasn't about to use the ugly plastic construction fence some other community plot-ers were using. (We may be cheap but we're not tacky!)

Luckily we found a plastic material that resembles chicken-wire that was actually cheaper than the ugly construction fence! It is about 3' high so we hung string above it and tied ribbon to it to scare off any would-be garden raiders.


After the fence was complete we were ready to plant!